
Planning a multi-day trip
Two ways to ride a trip. Some book the hotels in winter and know in May where they’ll sleep on Tuesday. Others decide over breakfast where the day goes, and over the second coffee, happily, decide again. The app handles both, with the same tools, just sorted differently.
First: the maps
Map and routing live on the device. Download every country you ride through beforehand, including the ones you only roll through. Downloading maps and countries tells you how.
Planned ahead: one folder, one route per day
Plan the day. Drop waypoints as usual, with the crosshair or the search, then the profile (Waypoints, Profiles and NoRoad). The hotel is the last waypoint. If you’re planning at home and the start is a day’s ride away, switch GPS start off in the route panel. Then the route begins at the first waypoint, not where you happen to be sitting.
Hotel, camping, fuel. Hamburger menu → Map POIs. Switch on the group Accommodation, from hotels to campgrounds, and Fuel. Everything is off by default. The markers come from the country pack and show up without signal too. Move the map until the crosshair sits on a marker. The main button now reads Add POI and appends the place to the route as a waypoint. If you want to keep the hotel in your library, tap Adopt as user POI in the popup. You can also put your own POIs into the route from the POIs tab with Add to route.
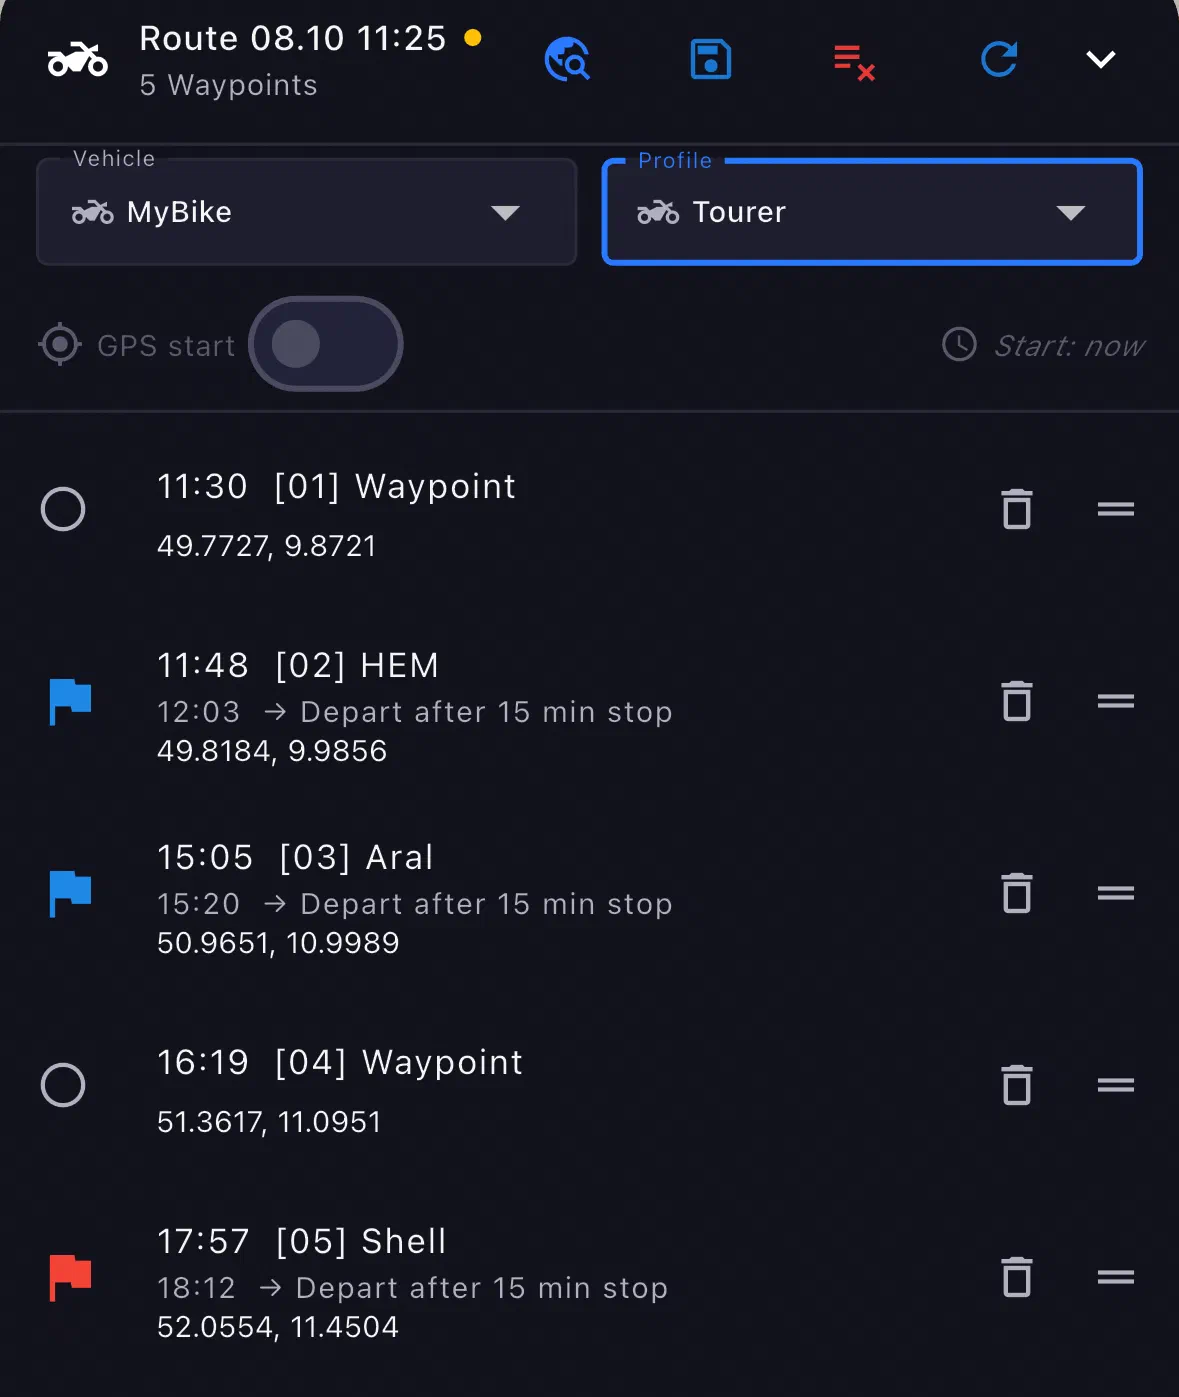
Stops. In a waypoint’s popup (crosshair on it) you’ll find the Stop row. Magnet is the drive-through, Break is the stop; this means a break in the route, not the recording pause. For a stop you enter the wait time in Wait (min), and it’s then built into every arrival time. At a gas station, a café or a restaurant the app calculates with a typical wait time by itself, and you overwrite it. For a hotel it suggests nothing; only you know how long you’re staying.
Saving. Route panel → Save as…, name to taste, say “Day 3 - Plitvice.” The route now sits in your library (Routes tab). The folder the dialog asks about belongs to this library; the trip folder comes in a moment, in the Projects tab. A route takes up to 50 waypoints (as of October 2026). A day doesn’t need 50.
Building the folder. Pull the Organizer down from the top edge → tab Projects → New folder, say “Croatia 2027.” In the folder Add… → Route, day by day, and you drag the order into place. The hotels and campgrounds of the trip can go into the same folder as POIs (Add… → POI).
Auto-advance stays off as long as every entry is one day. Otherwise the app starts the next day’s route as soon as you arrive at the hotel. The switch belongs to days made of several sections: ride in on pavement, gravel in the morning, pavement to the hotel. For that, create a New sub-folder for each day, move the sections into it, and in the sub-folder’s menu under Folder settings… set Auto-advance: On. The chain only runs inside that folder and ends with the last section. It only kicks in when you start the route from the folder, not from the Routes tab. How road, NoRoad and tracks from elsewhere work together there is covered in Navigation modes.
What the app calculates for each day
- The header above the map shows kilometers, riding time and arrival. The riding time includes the wait times.
- Planned start. The clock to the right of GPS start opens date and time, up to a year ahead. The arrival times in the panel follow from it.
- Crosshair on the line. The popup gives kilometers and time From start, From last waypoint, From last stop and From last gas station. A waypoint sitting on a gas station counts as a gas station. How far your tank gets you, the app doesn’t calculate; the line only counts kilometers and time. With Insert point you drop a new waypoint right there.
Morning: ride the day
Organizer → Projects → folder → in the menu of the day’s route, Ride this route. With GPS start on, the route begins where you stand. If you switched it off while planning, it begins at the first waypoint.
Plan changed? In the ride menu (button at the top right), Skip next waypoint skips the next waypoint. At a stop with a wait time, the app asks you to confirm with a swipe; a Magnet goes through without asking.
Fresh every morning
Breakfast, map open, coffee next to it.
- Destination. The search (globe with magnifying glass, tooltip “Find a place”) sits in the header of the route panel and takes place names, POIs and coordinates. While you type, your installed maps answer; the internet only when you tap Search online, and you need that for addresses. Tap a result, the map jumps there, main button Set waypoint. One waypoint is enough: GPS start is on by default, so the route begins with you.
- Profile. You choose it in the route panel: Tourer, Adventure, whatever the day deserves.
- Shape. One or two ride-throughs where the route should go over the pass and not through the tunnel. How close together, the chapter Waypoints explains.
- Fuel. Switch on Map POIs → Fuel, crosshair on the marker, Add POI. The station is appended at the end; in the route panel you drag it in front of the destination.
- Go. The button at the top right (navigation arrow) starts navigation.
With signal, the route is calculated on the server, where each road carries more knowledge than fits on a phone. That’s the switch “Prefer online route” under Settings → Navigation, on by default. Without signal the phone keeps calculating: dependable, but coarser. You switch nothing. The line on the map tells you who did the calculating: blue means phone, lime means server.
If you want to keep the day, save it (Save as…) and ride it tomorrow from the library.
Plan on the iPad, ride with the phone
The app has no account and so syncs nothing between your devices. If you plan on the iPad and ride with the phone, you send the folder over as a .mnav file: in the folder’s menu, Share…, and AirDrop is enough. Folder, order, waypoint types, wait times and Auto-advance travel along. Each device downloads its maps itself. More in the chapter GPX and .mnav.